
Hey Lovelies!
Today I'm talking all about those annoying dark under eye circles! Other than makeup, there are other ways to help get rid of these ... drink more water, get more sleep, exercise regularly, take your vitamins, etc. I am also guilty of rubbing my eyes and this is a big no-no. The skin around your eyes is so delicate so you need to take care and be very gentle when touching that area of your face. Finding a good eye cream is great too! As I mentioned in a previous post, I was really happy with the "Benefit It's Potent" eye cream. Finally, genetics can play a part so there's really nothing you can do to help that. Not going to get into more detail about all of the above because, well, I'm not a doctor. ;)
What I will get into more detail about is concealing them with makeup because that is something I am more knowledgeable about!
If you are trying to cover by using your regular concealer and not getting the results you are happy with, you probably need to get yourself a corrector.
A corrector is something you can use before your concealer to correct and cancel out the purple/blue of the dark circles. A corrector is something that is pink or salmon in color. The reason for this is simple ... if you look at the color wheel, the opposite of blueish green (the color of dark circles) is pink! Only problem is a straight pink can sometimes combine with blue and create purple ... and we don't want that! Because of this, you may need to look for something with a warmer undertone which is why I mentioned salmon. Applying the corrector is only the first step; you then need to go over that with a regular concealer (more close to your foundation color) to help it all blend together.
Are you confused yet? Not to worry, I will show you some photos of how I do this. As a bonus there are two tutorials ... one using drugstore products and one using high end! I like the result I get with both so if you are limited with budget and don't have access to the high end products, definitely give these drugstore ones a try!
TUTORIAL #1: DRUGSTORE

.jpeg)
Products Used:
1. L'Oreal Magic Lumi Concealer in "Fair" as my CORRECTOR
2. Maybelline Instant Age Rewind Dark Circles Eraser in "Light" as my CONCEALER
3. Rimmel Stay Matte in "Transparent" as my SETTING POWDER
4. Real Techniques Contour Brush used with the setting powder
4. Real Techniques Contour Brush used with the setting powder
As you can see in the above comparison photo on my hand, the corrector is a pink tone while the concealer is closer to a foundation colour.
Both of these products can be purchased in different shades (i.e.: the Magic Lumi pen has more yellow toned options and the Dark Circle Eraser has a pink shade). Another perk with the "Magic Lumi" pen is it can be used as a highlighter in other areas of the face too! Who doesn't like a multi-purpose makeup tool!?

Steps 1 and 2 show me applying the corrector and blending with my ring finger. Your finger is the best tool for blending these because it helps warm up the product to really melt into your skin and apply nicely. Steps 3 and 4 are me applying the concealer on top. A trick to help brighten your whole eye area is to apply concealer in a "V" shape going down towards your cheeks alongside your nose.
.jpeg)
.jpeg)
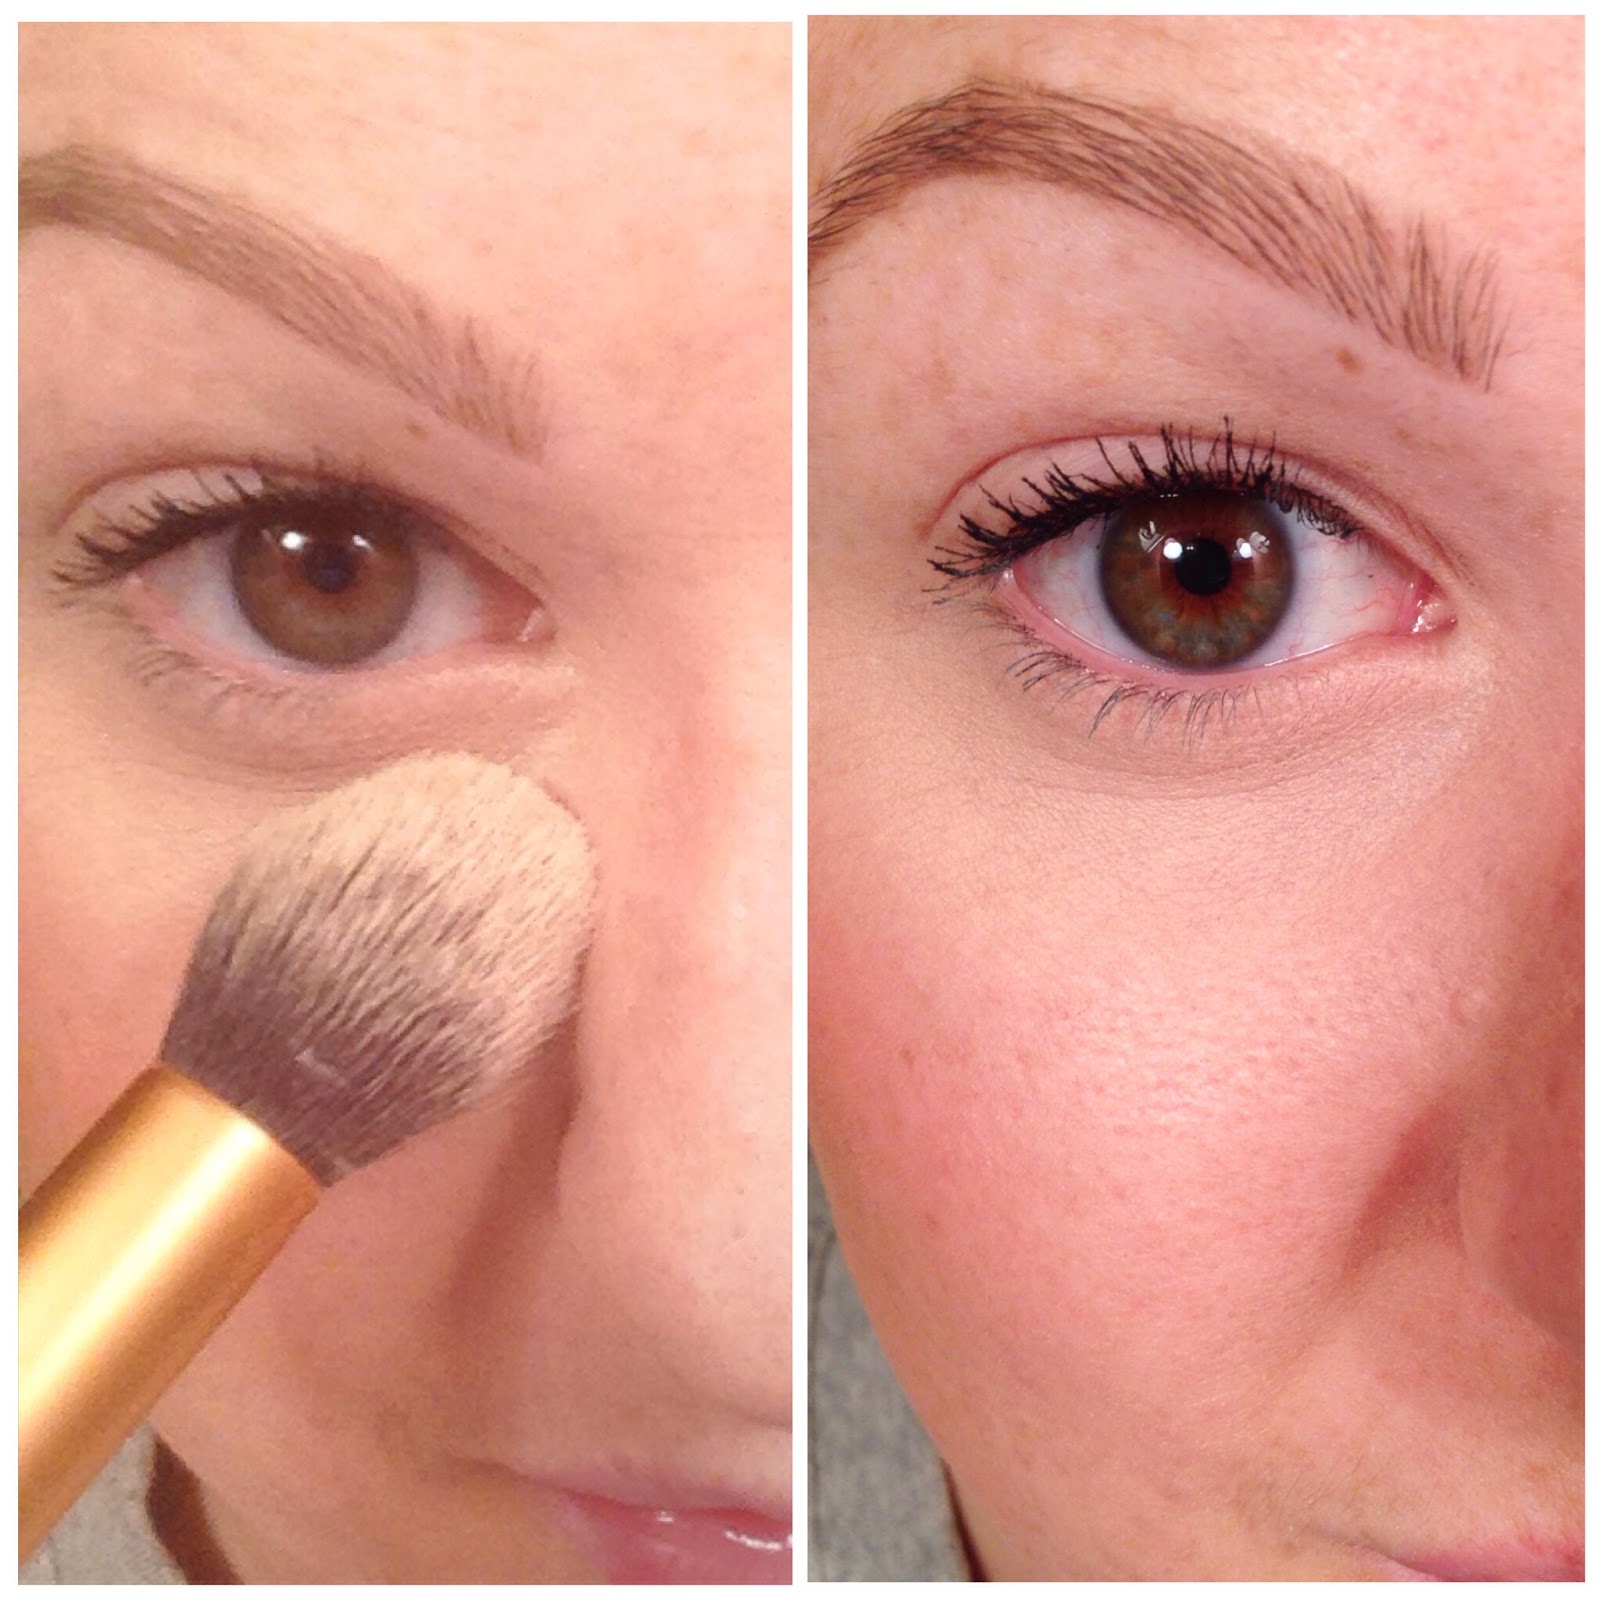
**Funny story about the before photo. I swear this was the ONE day I didn't have bad under eye circles! I'm happy about that but it really didn't help be show an accurate before shot ... but you get the idea! :)
* * * * * * * * * * * * * * * * * * * * * * * * * * * * * * * * * * * * * * * * * *
TUTORIAL #2: HIGH END
.jpeg)
.jpeg)
I followed the same steps here as I explained above. Steps 1 and 2 are using the Bobbi Brown Corrector and Steps 3 and 4 are showing the Nars Creamy Concealer on top.
.jpeg)


In the above photo you can see me setting the whole thing with powder. I love this brush because it is small enough to get into the corners of the under eye area. Remember to pat the powder on and not rub or brush away everything you just did! Setting the concealer with powder will help it stay all day long and not slide around your face.
Below is the before and after!

**Funny story about the before photo. I swear this was the ONE day I didn't have bad under eye circles! I'm happy about that but it really didn't help be show an accurate before shot ... but you get the idea! :)
* * * * * * * * * * * * * * * * * * * * * * * * * * * * * * * * * * * * * * * * * *
TUTORIAL #2: HIGH END
Products Used:
1. Bobbi Brown Corrector in "Light Bisque" as my CORRECTOR
2. Nars Creamy Concealer in "Vanilla" as my CONCEALER
3. Bare Minerals Mineral Veil as my SETTING POWDER
4. Real Techniques Contour Brush again used with the setting powder
4. Real Techniques Contour Brush again used with the setting powder

On a side note I have to say this Nars concealer has quickly become my new favorite! The drugstore ones I mentioned above are wonderful but there is something about this one I always reach for. It is creamy and has such high quality coverage. I find I achieve the same look with both the drugstore and high end products but the staying power of these high end ones really impress me.

I followed the same steps here as I explained above. Steps 1 and 2 are using the Bobbi Brown Corrector and Steps 3 and 4 are showing the Nars Creamy Concealer on top.
I used the same setting brush since it is my favorite and set the concealer with my Bare Minerals Mineral Veil. I use this as an all over setting powder when I use my Bare Minerals foundation and love the final touch it gives. It smooths out the foundation and really sets the whole look to a flawless finish.
Here is a before and after comparison using the high end products.

* * * * * * * * * * * * * * * * * * * * * * * * * * * * * * * * * * * * * * * * * *
Below is a photo of the final look after I applied the rest of my makeup. You really can't notice a difference so I really recommend either the drugstore or high end products. Both feel nice on the skin and do have good lasting power. I probably didn't need to even buy the high end stuff but you know I'm a bit of a product junkie and it was required for blog research! (hehe ... or that's what I tell my husband anyways!!) ;)
So - the bottom line is find a corrector that has a pink or salmon tone and apply that to the inner corners to correct the dark circles. Top the corrector with your regular yellow toned concealer, set it with some powder and you are good to go! Bye bye dark circles!!
Hope these tips help some of you! Let me know if there are any other makeup tutorials you would like to see!
Have a great week!
Great Post!!:)
ReplyDelete